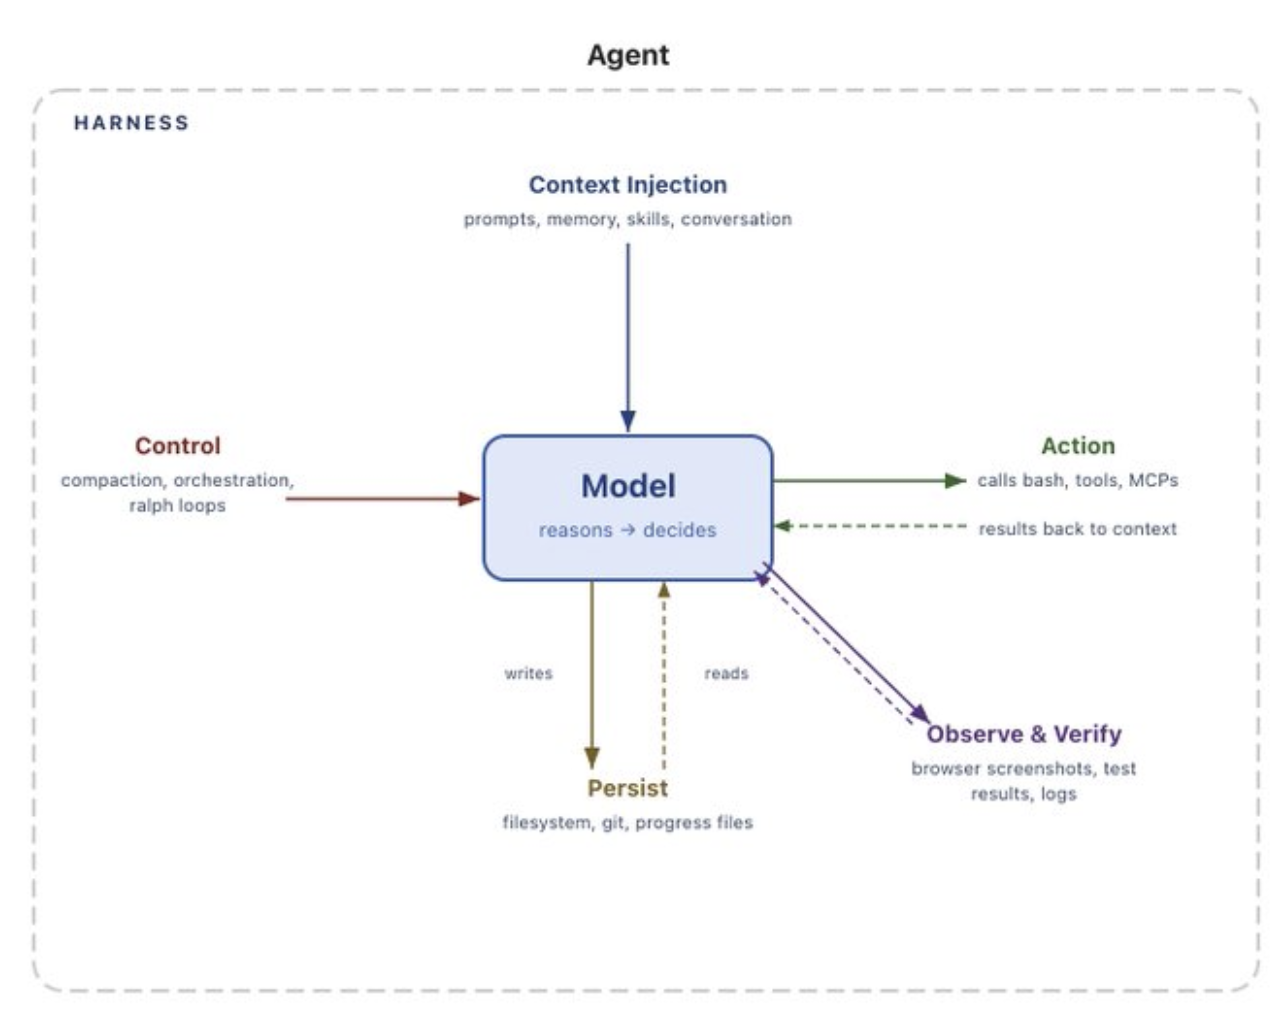
Agents are Loops
AI agents are simpler than you think
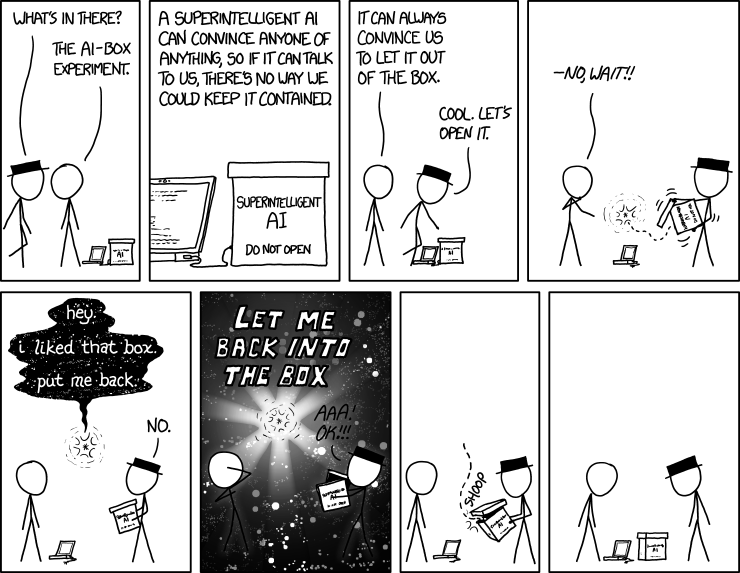
Image Source: XKCD
Act 1: From Chat to Action
In Part 1: ChatGPT Doesn’t Think. It Pays Attention, we opened up the hood and looked at how LLMs actually work. From how they tokenize the input text, embed it into vectors, run it through layers of attention, and predict the next token. As well as how they continue to do so until they get a token to end/stop. That is the core of every AI tool you use today, whether it is ChatGPT, Claude, Gemini, Grok, GLM, Kimi, etc. It is attention and next-token prediction, all the way down.
But here is the thing. LLMs, on their own, can only talk. They produce text, and stop at that. They cannot read your files. They cannot run code. They cannot search the web, book a flight, send an email, or do anything in the real world. They are incredibly sophisticated text generators, but text generators nonetheless.
And yet, tools like Claude Code, Cursor, OpenAI’s Codex, and GitHub Copilot clearly do things. They, for instance, read your codebase, edit files, run tests, fix bugs, and commit changes. If LLMs can only produce text, how are these tools taking actions in the real world?
The answer is surprisingly simple, and that is what this post is about.
Image Source: Inyoung Cheong: Consumer Reports
If you have been following the AI space at all, you have probably heard the word “agent” thrown around a lot. It is one of those terms that means something different depending on who you ask. Some people use it to mean autonomous AI that can operate independently. Others use it to mean any AI that can do more than chat. The marketing around it tends to make it sound like futuristic (which it is) but also really complex.
It’s really not.
Simon Willison has, perhaps, the clearest definition I have found: an agent is an LLM that runs tools in a loop to achieve a goal. That is it. An LLM (the language brain), tools (the hands), and a loop (repeated attempts with feedback). If you understand those three things, you understand what every agentic product is doing under the hood.
In this post, we will build up from “what is a tool?” to “what is an agent?” to “how do coding agents like Claude Code actually work?” And then we will build a tiny one ourselves in about 80 lines of Python. By the end, the magic should feel a lot less magical and a lot more mechanical.
Chatbot vs. Agent: The Key Difference
Before we get into the details, it helps to draw a clear line between two things that look similar but work very differently.
A chatbot is a single exchange portal. You send a message, the LLM processes it, and it sends back a response. The LLM cannot take actions, check results, or try again if something goes wrong. This is what you are doing when you ask ChatGPT a question and get an answer. The model generates text, and that is the end of the interaction (until you type something else).
An agent is a loop. You give it a goal (“fix the failing test in auth.py”). Instead of just generating a response, it figures out what to do, takes an action (reads and/or runs the test file), observes the result (sees the error message), decides on the next step (reads the source file), takes another action (edits the code), checks the result (runs the tests), and repeats until the goal is met or it runs out of budget. This is the loop that I am concerned could replace me at my job, lol.
The difference is not the model, because the same LLM powers both. Agents, however, have a program loop wrapped around the model. So while a chatbot calls the LLM once, an agent calls the LLM in a loop, with tool execution happening between calls.
It is worth noting, though, that even familiar chatbot interfaces are starting to blur this line. For instance, if you ask ChatGPT what time it is, the model does not know the time, but it can use a tool to look it up and respond. Similarly, it can search the web to see what important events are happening in your city around that time. So while it might not be a full agent loop, the underlying mechanism is the same.

Image Source: Jakob Nielsen on UX
IBM frames agents as systems that “autonomously perform tasks by designing workflows with available tools.” GitHub describes them as AI systems that “can independently plan and execute complex tasks.” At the implementation level, it is simpler than either of those descriptions makes it sound. It is a while loop.
Here is the core of the post in one sentence: everything we are about to cover, from tool use to the agent loop to coding harnesses, is mostly just different ways of putting an LLM inside a while loop with access to functions it can call.
Let’s start with the functions.
Act 2: Tool Use
What Is a Tool?
A tool, in the context of LLMs, is just a function that the LLM can ask your program to run. It is a regular function, like one you would write in Python, JavaScript, or Bash. The only difference in this case is that you describe the function to the LLM (its name, what it does, what argument it takes, etc.), and the model gets to decide when to call it and with what input.
Let’s look at an example to see what this might look like in practice. Say you have a function called get_weather that takes a city name and returns the current weather (the details of how you get the weather don’t matter). You tell the LLM that it has access to a tool called get_weather. And that the function takes one argument, city, which is a string. The LLM can use it when someone asks about the weather. You pass this description along when you call the LLM.
Now, when a user asks “What is the weather in Seattle?” (Nobody should be asking this, though, as it should be obvious that if it’s summer, it’s sunny, if it’s not summer, it’s raining, haha), the LLM has a choice. It can either try to answer from its training data (which might be outdated or wrong), or it can output a structured tool call that says: “I want to call get_weather with city Seattle.”
Here’s an important detail. The LLM does not actually run the function. It requests that the function be run. It outputs a structured message (usually JSON) that says “call this tool with these arguments.” Then, your code, the program sitting between the user and the LLM, intercepts that request, executes the actual function, gets the result, and sends it back to the LLM. The LLM then uses the result to generate its final response.
Thus, the LLM is the decision maker. Your code, running in whatever runtime you have set up, is the executor. The LLM says what to do, your program does it, and the LLM uses your program output to improve its response.
This pattern goes by different names depending on the provider. Anthropic calls it tool use. OpenAI calls it function calling. It is the same concept, just different branding.
A Concrete Example
Let’s walk through a complete example from start to finish, so this isn’t abstract anymore.
Setup. You are building an app that lets users ask about the weather. You have access to a weather API that returns the current temperature and conditions for a given city name. You define this as a tool:
tools = [
    {
        "name": "get_weather",
        "description": "Get the current weather for a city",
        "input_schema": {
            "type": "object",
            "properties": {
                "city": {
                    "type": "string",
                    "description": "The name of the city"
                }
            },
            "required": ["city"]
        }
    }
]
That JSON schema describes the tool to the LLM. And you are basically telling it: this tool exists, here is what it does, here are the arguments it expects, and their types. The LLM reads this description the same way it reads any other text in its context, and it uses that understanding to decide when and how to call the tool.
Conversation. Now a user asks: “What’s the weather in Seattle?”
Here is what happens step by step:
-
User sends message. “What’s the weather in Seattle?”
-
Your code sends this to the LLM, along with the tool definitions. The LLM now knows it has a
get_weathertool available. -
The LLM responds with a tool call instead of regular text. So instead of guessing at the weather (and potentially hallucinating), it outputs something like:
{
    "type": "tool_use",
    "name": "get_weather",
    "input": { "city": "Seattle" }
}
- Your code executes the tool. You take the city name “Seattle”, call your weather API, and get back real data:
{ "temperature": 58, "condition": "cloudy", "humidity": 72 }
-
Your code sends the result back to the LLM as a tool result message.
-
The LLM generates its final response, now grounded in real data: “It’s currently 58°F and cloudy in Seattle, with 72% humidity.”
Here is what that looks like in simplified Python using the Anthropic SDK:
import anthropic
import requests

client = anthropic.Anthropic()

# The actual function that gets weather data
def get_weather(city):
    response = requests.get(f"https://api.weather.example.com/current?city={city}")
    return response.json()  # e.g. {"temperature": 58, "condition": "cloudy", "humidity": 72}

# The tool definition: tells the LLM what this function does and what arguments it takes
tools = [
    {
        "name": "get_weather",
        "description": "Get the current weather for a city",
        "input_schema": {
            "type": "object",
            "properties": {
                "city": {
                    "type": "string",
                    "description": "The name of the city"
                }
            },
            "required": ["city"]
        }
    }
]

# Step 1: Send the user's message with the tools available
response = client.messages.create(
    model="claude-opus-4-7",
    max_tokens=1024,
    tools=tools,
    messages=[
      {
        "role": "user",
        "content": "What's the weather in Seattle?"
      }
    ]
)

# Step 2: The LLM responds with a tool call
# response.stop_reason == "tool_use"
# response.content contains a tool_use block:
# {"type": "tool_use", "id": "toolu_abc123", "name": "get_weather", "input": {"city": "Seattle"}}

tool_use_block = next(b for b in response.content if b.type == "tool_use")

# Step 3: YOUR code executes the actual function
weather_data = get_weather(tool_use_block.input["city"])  # calls the real weather API

# Step 4: Send the tool result back to the LLM
follow_up = client.messages.create(
    model="claude-opus-4-7",
    max_tokens=1024,
    tools=tools,
    messages=[
        {"role": "user", "content": "What's the weather in Seattle?"},
        {"role": "assistant", "content": response.content},
        {"role": "user", "content": [
            {
                "type": "tool_result",
                "tool_use_id": tool_use_block.id,
                "content": str(weather_data)
            }
        ]}
    ]
)

# Step 5: The LLM now responds with a grounded answer
print(follow_up.content[0].text)
# "It's currently 58°F and cloudy in Seattle, with 72% humidity."
There are a few things worth noticing here.
First, the LLM never touched the weather API. It decided what to call and with what arguments, but your code did the actual execution. The LLM itself is sandboxed; so while it can request actions, it cannot take them directly. This is important for safety, as you can control what actually runs, and for flexibility (as you can connect any tool you want, from databases to APIs, file systems, and shell commands).
Second, the tool description matters. If you describe the tool poorly, the LLM will not know when to use it or how to call it correctly. If you describe it well, the LLM will use it at the right time with the right arguments. Writing good tool descriptions is a real skill, similar to writing good prompts.
Thirdly, if you look at the message flow, it is a conversation. It starts with the user message, the assistant’s response (tool call), the tool’s execution and result, and finally the assistant’s final response. Like in a regular chat, the LLM is still predicting the next token. However, in this case, one of the possible “next tokens” is a structured tool call instead of natural language text. The model learns when to emit tool calls during training, and the tool definitions in context tell it which tools are available for the current conversation.
From One Tool Call to Many
Image Source: marketoonist
Our weather example was a single tool call. And our entire flow was a simple question, with only one function available that produced a single result/answer. Real-world tasks are rarely that simple.
For instance, we can think about what happens when someone asks a coding agent to “find all the TODO comments in a project and make a checklist.” A request like this requires multiple steps. We could say:
- List the files in the project directory
- Read each file and search for TODO comments
- Collect all the results
- Format them into a checklist
Each step will have a separate tool call. The LLM could call list_files to get a list of filenames. After that, it calls read_file on each of them, reads the contents, finds and extracts the TODOs, and then synthesizes everything into a response. Each tool result becomes the context for the next decision.
Another approach could be for the LLM to call a grep tool to search for lines containing the text “TODO”, “todo”, “to do”, etc. And then it could call a read_lines tool to read the lines around the todo pattern, find details about each todo, and synthesize the output into a response.
Or let’s consider another task that we referenced earlier (a much harder one): “fix the failing test in test_auth.py.” The steps could look like:
- Read
test_auth.pyto see what test is failing. - Run the test to see the actual error message.
- Read the source file that the test is testing.
- Edit the source file to fix the bug.
- Run the test again.
- If it fails again, read the error, edit again, run again.
- If it passes, report success.
That is seven or more tool calls, with the LLM deciding on each step based on the results of the previous step. And at step 6, the key insight is that the LLM can fail, see the failure, and try again. This way, it is not just executing in a fixed sequence. Instead, it adapts and takes action based on feedback.
This is how tool calling becomes a loop. The LLM calls a tool, observes the result, decides what to do next, then calls another tool, observes the result, and keeps going. The conversation history grows with each step, and the LLM continues to use that full history to make each subsequent decision.
This loop is what turns an LLM from a chatbot into an agent.
Act 3: The Agent Loop
The Core Concept
At the end of Act 2, we saw how multiple tool calls naturally chain together. The LLM, as we described, calls a tool, gets a result, uses the result to decide what to do next, such as calling another tool, and so on. That chain is the agent loop, and implementing it is interestingly simple.
Here’s what it could look like in pseudocode:
while not done:
  1. Send the conversation history to the LLM
  2. The LLM responds with either:
    a. Text (it is done, or it wants to say something)
    b. A tool call (it wants to do something)
  3. If tool call:
    a. Execute the tool
    b. Add the result to the conversation
    c. Go back to step 1
  4. If text, we are done
Image Source: XKCD
Given that agent architecture, we can now do a rough implementation in Python:
import anthropic

client = anthropic.Anthropic()

def agent_loop(user_message, system_prompt, tools):
    messages = [{"role": "user", "content": user_message}]

    while True:
        response = client.messages.create(
            model="claude-opus-4-7",
            max_tokens=4096,
            system=system_prompt,
            tools=tools,
            messages=messages
        )

        # Add the assistant's response to the conversation history
        messages.append({"role": "assistant", "content": response.content})

        # If the model is done talking, return the final text
        if response.stop_reason == "end_turn":
            return response.content[0].text

        # If the model wants to use a tool, execute it
        if response.stop_reason == "tool_use":
            tool_results = []
            for block in response.content:
                if block.type == "tool_use":
                    result = execute_tool(block.name, block.input)
                    tool_results.append({
                        "type": "tool_result",
                        "tool_use_id": block.id,
                        "content": result
                    })

            # Add tool results to the conversation and loop back
            messages.append({"role": "user", "content": tool_results})
While running, our agent loop continues until the LLM decides it is done and responds with text instead of a tool call. The underlying logic itself makes it very simple and accessible to have an agent up and running. After that, we can naturally layer additional logic and complexity, such as parallelism and multi-agent workflows, on top of the agent loop to make it more sophisticated.
Thorsten Ball, who works on Ampcode (a coding agent), in describing this logic, wrote, “It’s an LLM, a loop, and enough tokens. The rest is elbow grease.” Mihail Eric demonstrated this by building a working Claude Code clone in roughly 200 lines of Python with a loop, some tool definitions, and API calls. Similarly, the Anthropic guide on building agents describes this same pattern.
I must confess that, when I started learning about this, I was surprised to find that there is no special “agent mode” in the model. Realizing that helped me feel confident that I can utilize AI to build sophisticated workflows. And honestly, almost anybody could, too.
Why the Loop Works
You might be wondering now, if the LLM is predicting the next token, how does a simple loop produce behavior that looks so intelligent? To answer that, we can look at three properties of LLMs that enable this.
First, LLMs are good at deciding what to do next. After each tool call, the LLM receives a full conversation history that includes the original goal, every tool call it has made so far, and every result it has gotten back. Given all of that context, next-token prediction naturally tends towards the next useful action. Even though it could help, the model typically does not need a formal plan to predict what a helpful coding (or any) assistant would do next, given everything that has happened so far. And those predictions often turn out to be the right thing.
Second, LLMs can recover from errors. This is the part that makes agents feel genuinely useful. If a tool call fails (say a file is not found, a test fails, a command returns an error, etc.), the error message goes right back into the conversation. The LLM sees the error and can try a different approach. For instance, maybe it got the file path wrong, so it lists the directory first and shows the correct name. Maybe the code fix did not work; it can read the error message more carefully and try a different edit. This is the feedback loop in action, and it is why agents can handle tasks that are not straightforward. We can think of it as the “Think, Act, Observe” cycle: the agent allows the LLM to predict, execute, read the results, and predict again.
An interesting story that illustrates this comes from Peter Steinberger, the creator of OpenClaw. He had built a text-based travel agent to help him navigate a city, find restaurants, and translate text. He accidentally sent a voice message, even though he had never built in voice support. To his surprise, the agent responded in a few seconds. What happened was the agent recognized the audio input, searched the local machine for FFMPEG to convert the audio format, found an OpenAI API key, made a voice-to-text API call, and then responded to the transcribed message. Nobody programmed that workflow. The agent improvised it from the tools available to it. You can read about this here, or hear Peter Steinberger talk about it on TED.
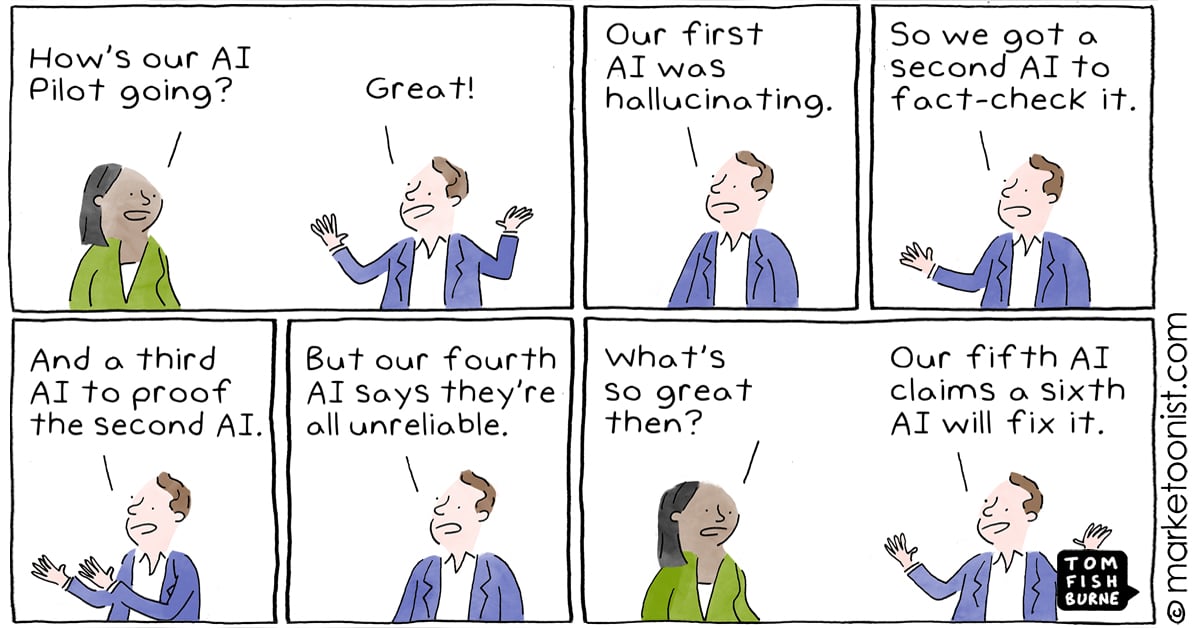
Image Source: marketoonist
Third, the context window holds everything together. The entire conversation history (user messages, tool calls, tool results, the model’s own reasoning) stays in the context window. The LLM can look back at anything. It can see what the user originally asked, what it has tried, what worked, and what did not. This is why context window size matters so much for agents. A longer context window means the agent can take more steps before it runs out of space to remember what it has done. This is also directly connected to what we covered in Part 1 about attention. The model attends to the full context at every step, meaning that token 1 (the user’s original request) is just as accessible as the most recent tool result.
One more thing worth connecting back to Part 1. Remember chain-of-thought prompting and reasoning models? Those techniques make agents significantly better. When an LLM can “think” through what to do next (by generating reasoning tokens before committing to a tool call), it makes fewer mistakes and picks better actions. Extended thinking essentially gives the model scratch paper before each decision in the loop.
A Note on Context Windows
A question might be looming in your mind about what happens when we start to hit the agent’s context window limit. It is a fair question, because if the agent loop keeps appending tool calls and results to the conversation history, that history is going to grow with every single iteration. And every iteration, the entire history gets sent back to the LLM.
Modern models have large context windows. Claude supports up to 1M tokens. Gemini also goes up to 1 million (and has experimented with even more). GPT-5.5 reaches 1,050,000 tokens. These are big numbers. To put things in perspective, 200,000 tokens is roughly 150,000 words, or about the length of two full novels. So for most tasks, you are not going to run out of space.
That said, big does not mean unlimited, and there are real problems that show up well before we actually start to hit the limit.
The first problem is cost. LLM APIs charge per token, both input and output. Every time the agent loops, it sends the entire conversation history as input. So if your conversation is 50,000 tokens long and the agent makes 10 more tool calls, you are paying for 50,000+ input tokens on every single call. The cost grows quadratically with the length of the task. Hence, long agent sessions can get expensive fast.
Image Source: marketoonist
The second problem is latency. More input tokens means more time for the model to process the request. An agent call with 5,000 tokens of context is fast. An agent call with 100,000 tokens of context is noticeably slower. For interactive coding agents where you are watching the agent work in real time, this slowdown can become very visible.
The third problem, and honestly the most interesting one, is attention quality. Remember from Part 1 that attention is how the model decides what information is relevant. In theory, self-attention gives every token equal access to every other token. In practice, however, research has shown that LLMs tend to pay more attention to information at the beginning and end of the context window, and less to information in the middle. This is sometimes called the “lost in the middle” problem (Liu et al., 2023). So if a critical piece of information (like the original error message that the agent is trying to fix) ends up buried in the middle of a 100,000-token conversation, the model might not attend to it as strongly as it should. The information is technically there, but the model might not make good use of it.
So how do production agents handle this? There are a few approaches.
Compaction (sometimes called summarization) is the most common technique. When the conversation gets too long, the agent pauses and asks the LLM to summarize the conversation so far into a shorter version. The summary replaces the older parts of the conversation, freeing up space while (hopefully) preserving the important details. Anthropic’s API, and generally almost all LLM providers, support this directly. But the tradeoff is obvious because summaries are lossy. The LLM has to decide what is important to keep and what to throw away and it does not always get that right. A subtle detail from 30 tool calls ago might turn out to be exactly what the agent needs later, but if it got summarized away, it is gone.
Selective context is another approach. Instead of keeping the entire conversation history, the agent includes only the parts relevant to the current step. For a coding agent, that might mean: always include the original user request, always include the most recent few tool calls, and only include file contents when they are actively being worked on. This keeps the context focused and small, but it requires careful engineering to decide what to include and what to leave out.
Caching helps with the cost problem specifically. If the first 80% of your conversation is the same across consecutive calls (which it is, since you are only appending new messages at the end), you do not need to reprocess all of it. Techniques like prompt caching and KV caching (which we mentioned briefly in Part 1) allow the model to reuse computations from previous calls rather than reprocessing the entire history from scratch every time.
The bottom line is context windows are large enough for most tasks, and getting larger all the time. The real constraint, though, is not just the hard limit. It is also the cost, speed, and attention quality tradeoffs that come with filling up the context window. The best agents are smart about what they put in the context and how they manage it over long sessions.
What Agents Are NOT
This is the part where I want to be honest, because there is a lot of hype around agents and I think it is important to be clear about what they actually are right now.
Agents are not autonomous AI. The word “autonomous” gets used a lot in marketing, but current agents do not have goals, desires, or self-awareness. They run a loop until the loop ends. They do not decide to start working on their own. A human initiates the task, and the agent runs until it finishes, gets stuck, or hits a budget limit. That is not autonomy in any meaningful sense.
Agents are not reliable. This is the big one. Agents can and do get stuck in loops, trying the same failing approach over and over. They hallucinate tool arguments (such as calling read_file with a path that does not exist). They make confident but wrong decisions (they could edit the wrong file, or “fix” a bug by deleting the test that caught it). They sometimes do something completely unrelated to what you asked. Every person I know who uses coding agents has had stories of an agent going off the rails. They are powerful tools, but they still require supervision. The amount of supervision could reduce over time, but we are not there yet. But who knows, DeepSeek could drop a new model tomorrow that changes everything.
Agents are not magic. This is the “emperor has no clothes” observation from Mihail Eric, and it is the central theme of this post. The core architecture of every AI agent, from the simplest scripts to products like Claude Code and Cursor, is a while loop with an LLM and some tools. The complexity in production agents is not in the architecture. It is in the engineering: error handling, safety guardrails, context management, prompt tuning, and UX polish. The core is genuinely simple.
Agents are not free. Each iteration of the loop is an LLM API call, and those cost money. A simple task might take 3-5 tool calls. A complex task (like refactoring a module and updating all its tests) might take 30, 50, or more. The token usage adds up quickly, and this is before you count the growing context window that gets sent with every call. This is why production agents have budget limits and stop conditions. Without them, a confused agent could burn through a lot of tokens going in circles.
Types of Agents

Image Source: marketoonist
I do not want to spend too long on taxonomy because it can get academic fast, but it is helpful to know the main categories people are talking about when they say “agent.”
Retriever agents search through documents, summarize what they find, and cite sources. Think of research assistants or tools that answer questions from a company’s internal documentation. These are sometimes implemented using RAG (Retrieval-Augmented Generation).
Workflow agents perform multi-step tasks using APIs. This could include booking a flight, processing a form, ordering food, purchasing groceries, pulling data from multiple sources, and generating a report. The tools here are usually API calls to external services.
Coding agents read files, edit code, run tests, and iterate until things work. This is what Claude Code, Cursor, OpenAI’s Codex, Amp, and Aider are. We will go deep on these in Act 4.
Multi-agent systems use multiple LLMs/agents coordinating together. One agent writes code, another reviews it, a third runs tests. Or a “manager” agent delegates tasks to specialized sub-agents. These are more experimental and more complex, but the building block is still the same (an LLM in a loop with tools).
If you want the textbook taxonomy (reflex agents, goal-based agents, utility-based agents, learning agents), IBM has a good overview. Databricks also has a practical breakdown. But for the purposes of this post, we are going to focus on coding agents, because that is where the “it’s just a loop” insight is most visible and most useful.
Let’s build one.
Act 4: Coding Harnesses
What Is a Coding Harness?
Now that we understand the agent loop, let’s look at a specific and practical application of it, coding agents.
A coding harness (sometimes called a coding agent) is just the agent loop from Act 3 with tools designed for software development. Instead of get_weather, the tools are things like read_file, edit_file, and run_command. The LLM reads your code, decides what to change, makes the change, and checks if it worked.
This is what powers the popular coding agents like Codex, Amp, OpenCode, Cline, etc. When you use any of these tools and it feels like the AI is “understanding” your codebase and making intelligent changes, what is actually happening is the loop we just described. The LLM reads files (tool call), thinks about what to do (next-token prediction), edits code (tool call), runs tests (tool call), sees if they pass (reads the result), and keeps going until it is done.
As we mentioned earlier, Thorsten Ball from Amp described this process as an LLM, a loop, and enough tokens. According to him, the rest is elbow grease. It turns out the “elbow grease” is quite significant (we will get to that), but the architecture underneath all of these products is the same simple loop.
The Minimal Tool Set
So what tools does our coding agent actually need? Honestly, not many. Learning that surprised me, too.
Mihail Eric built a working Claude Code clone with just three tools:
read_file(path)— read the contents of a filelist_files(directory)— list files in a directoryedit_file(path, old_text, new_text)— find a piece of text in a file and replace it with something else
With just these, the LLM can navigate a codebase to see what is there (list_files tool), understand the code by inspecting the files (read_file tool), and make changes to the code (edit_file tool). These three operations cover a surprisingly large range of coding tasks. In fact, if we want to push things to the extreme, we could get away with just giving the agent one tool, a bash tool that allows it access to a shell (even a pseudo/simulated shell would do), and use shell commands to see the files, read the code, and make edits. We won’t be going to that extreme in our example, but you get the idea.
Here is what the implementations of those tools could look like:
import os

def read_file(path):
    with open(path, 'r', encoding='utf-8') as f:
        return f.read()

def list_files(directory):
    entries = []
    for name in os.listdir(directory):
        full = os.path.join(directory, name)
        entries.append(f"{'[DIR] ' if os.path.isdir(full) else ''}{name}")
    return "\n".join(entries)

def edit_file(path, old_text, new_text):
    content = read_file(path)
    if old_text not in content:
        return f"Error: could not find the specified text in {path}"
    updated = content.replace(old_text, new_text, 1)
    with open(path, 'w', encoding='utf-8') as f:
        f.write(updated)
    return f"Successfully edited {path}"
Looking at how simple those functions are, it becomes immediately obvious that the intelligence is not in the tools. It is in the LLM deciding which tool to call, when to call it, and with what arguments. The tools are hands. The LLM is the brain telling the hands what to do.
Production agents add more tools on top of these. The most common additions are:
run_command(command)— execute a shell command (run tests, install packages, compile code, check git status, etc.)search(pattern)— search across files using something like grep or ripgrepcreate_file(path, content)— create a new file from scratchdelete_file(path)— remove a file
That said, the core insight that you do not need many tools still holds. As we established, three (or even one) gets you surprisingly far. Everything else is optimization.
Building a Coding Agent from Scratch
Let’s put it all together and build a minimal but functional coding agent. We need three things: a system prompt, tool definitions, and the agent loop.
The System Prompt
The system prompt tells the LLM what it is and how it should behave. For a coding agent, we want to tell it to read files before editing them and to verify its changes:
system_prompt = """You are a coding assistant. You help users with their codebase
by reading, understanding, and editing files.

Rules:
- Always read a file before editing it so you understand the current state
- After making an edit, read the file again to verify your change was applied correctly
- If something goes wrong, try a different approach
- Explain what you are doing and why"""
The Tool Definitions
These are the JSON schemas that tell the LLM what tools are available. Same format we saw in Act 2 with the weather example:
tools = [
    {
        "name": "read_file",
        "description": "Read the contents of a file at the given path",
        "input_schema": {
            "type": "object",
            "properties": {
                "path": {
                    "type": "string",
                    "description": "The path to the file to read"
                }
            },
            "required": ["path"]
        }
    },
    {
        "name": "list_files",
        "description": "List all files and directories at the given path",
        "input_schema": {
            "type": "object",
            "properties": {
                "directory": {
                    "type": "string",
                    "description": "The directory path to list"
                }
            },
            "required": ["directory"]
        }
    },
    {
        "name": "edit_file",
        "description": "Edit a file by replacing old_text with new_text. The old_text must match exactly.",
        "input_schema": {
            "type": "object",
            "properties": {
                "path": {
                    "type": "string",
                    "description": "The path to the file to edit"
                },
                "old_text": {
                    "type": "string",
                    "description": "The exact text to find in the file"
                },
                "new_text": {
                    "type": "string",
                    "description": "The text to replace it with"
                }
            },
            "required": ["path", "old_text", "new_text"]
        }
    }
]
The Agent Loop
Now we wire it all together. This is the same loop from Act 3, but with the actual tool execution connected:
import anthropic

client = anthropic.Anthropic()

def execute_tool(name, args):
    if name == "read_file":
        return read_file(args["path"])
    elif name == "list_files":
        return list_files(args["directory"])
    elif name == "edit_file":
        return edit_file(args["path"], args["old_text"], args["new_text"])
    else:
        return f"Unknown tool: {name}"

def run_agent(user_message):
    messages = [{"role": "user", "content": user_message}]

    while True:
        response = client.messages.create(
            model="claude-opus-4-7",
            max_tokens=4096,
            system=system_prompt,
            tools=tools,
            messages=messages
        )

        messages.append({"role": "assistant", "content": response.content})

        if response.stop_reason == "end_turn":
            # Extract and return the final text
            for block in response.content:
                if hasattr(block, "text"):
                    return block.text
            return "Done."

        if response.stop_reason == "tool_use":
            tool_results = []
            for block in response.content:
                if block.type == "tool_use":
                    print(f"  → Tool call: {block.name}({block.input})")
                    result = execute_tool(block.name, block.input)
                    print(f"  ← Result: {result[:200]}...")
                    tool_results.append({
                        "type": "tool_result",
                        "tool_use_id": block.id,
                        "content": str(result)
                    })

            messages.append({"role": "user", "content": tool_results})

# Run it
print(run_agent("Add a docstring to the main function in app.py"))
That is your entire coding agent in roughly 80 lines of Python. From here, you can embellish it, but this is roughly the starting point that Cursor, for instance, begins.
A Real Walkthrough: “Add a Docstring”
Let’s see what happens when we actually run this agent. Say you have a file called app.py that looks like this:
import sys

def main():
    print("Hello, world!")
    return 0

if __name__ == "__main__":
    sys.exit(main())
You ask the agent: “Add a docstring to the main function in app.py.”
Here is what happens, step by step:
Step 1. The LLM receives your message and the tool definitions. It thinks: “I need to see the current code first before I can edit it.”
Step 2. The LLM outputs a tool call: read_file(path="app.py"). Your code executes it, reads the file, and sends the contents back to the LLM.
Step 3. The LLM now sees the code. It identifies the main function and sees that it has no docstring. It decides to add one.
Step 4. The LLM outputs a tool call: edit_file(path="app.py", old_text="def main():\n print(\"Hello, world!\")", new_text="def main():\n \"\"\"Entry point for the application.\"\"\"\n print(\"Hello, world!\")"). Your code executes the find-and-replace.
Step 5. The LLM wants to verify the change, so it outputs another tool call: read_file(path="app.py"). Your code reads the file again and sends it back.
Step 6. The LLM sees the updated file with the docstring in place. Everything looks correct.
Step 7. The LLM responds with text: “Done. I added a docstring to the main function in app.py.”
A Harder Example: Fix a Failing Test
Now consider a more complex task: “Fix the failing test in test_auth.py.” (We keep coming back to this one, haha)
The trace might look something like this:
read_file("test_auth.py")→ sees the test code, identifies the failing testrun_command("python -m pytest test_auth.py -x")→ sees the error:AssertionError: expected 200 but got 401read_file("auth.py")→ reads the source code being testededit_file("auth.py", ...)→ fixes the bug in the authentication logicrun_command("python -m pytest test_auth.py -x")→ tests still fail with a different errorread_file("auth.py")→ re-reads the file to understand the new erroredit_file("auth.py", ...)→ tries a different fixrun_command("python -m pytest test_auth.py -x")→ all tests pass- Responds: “Fixed. The issue was…”
Notice that in step 5, the fix did not work. The agent saw the failure, read the error, and tried again. This is the feedback loop that we referenced in Act 3. We see the agent adapting based on what happens at each step. This ability to recover from failure is exactly what makes agents feel very powerful.
This example also uses run_command, which our minimal three-tool agent does not have. Adding it is straightforward:
import subprocess

def run_command(command):
    result = subprocess.run(
        command, shell=True, capture_output=True, text=True, timeout=30
    )
    output = result.stdout + result.stderr
    return output[:10000]  # truncate long outputs to avoid filling up the context
With these four tools (read, list, edit, run), you can handle the majority of real coding tasks.
What Production Agents Add on Top
Our toy agent works. You could use it right now for simple tasks. But if you compare the experience to using Claude Code or Cursor, you’ll notice a significant gap. Production agents add a lot of engineering on top of the core loop. Here are some of the things that separate a weekend project like this from a real product.
Better tools. Production agents have more than our four basic tools. They include things like ripgrep for fast code search, git operations (diff, commit, checkout, etc.), LSP integration for type checking and go-to-definition, and browser tools for looking up documentation. More tools means the agent can handle more situations without getting stuck.
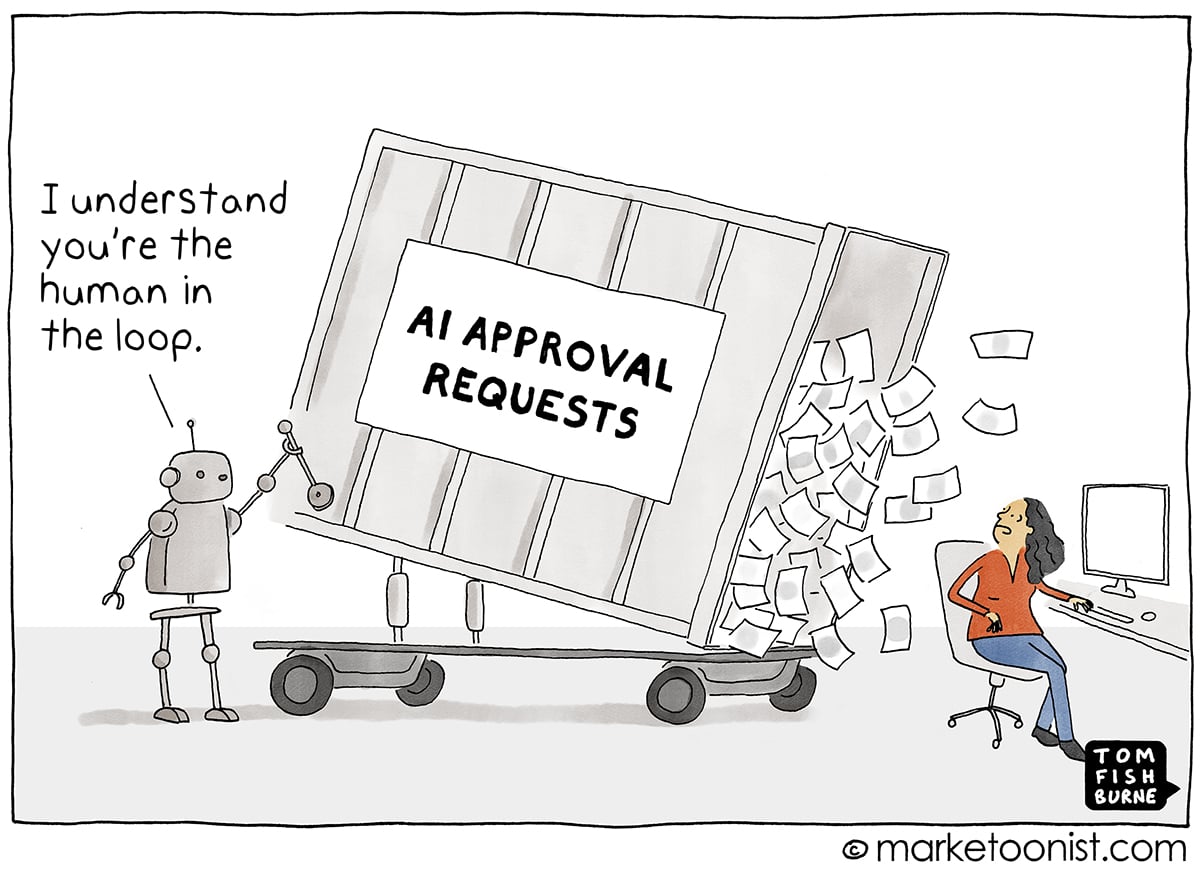
Image Source: marketoonist
Safety and permissions. This is critical. Our toy agent will happily run rm -rf / if the LLM decides to. Production agents have permission systems that ask for confirmation before running destructive commands, sandboxing that limits what the agent can access, allowlisted commands, and cost limits that stop the agent after a certain number of API calls. Claude Code’s permission system, for example, distinguishes between read-only operations (auto-approved) and write operations (require confirmation, unless you explicitly configure otherwise).
Context management. As we discussed in the context window section, long agent sessions fill up the context. Production agents use compaction, selective context inclusion, and caching to keep things manageable. They might summarize older parts of the conversation, only include file contents that are actively relevant, and cache previous computations to reduce cost and latency.
System prompts. Our system prompt was four lines. Production system prompts are long and carefully tuned. They include detailed instructions about coding style, error handling, when to ask for clarification versus when to proceed, safety rules, and much more. The quality of the system prompt has a huge impact on how useful the agent feels.
Streaming and UX. When you watch Codex or Cursor work, you see what the agent is doing in real time. This includes which file it is reading, what command it is running, what changes it is making. That part of the process is not AI work. It generally takes sophisticated frontend and UX engineering to achieve, but makes a massive difference to the user experience. Because watching an agent work in real time (and being able to interrupt it) builds trust in a way that waiting for a final answer generally does not.
Diff-based editing. Our edit_file tool uses simple string find-and-replace, which is fragile. If the LLM gets the old_text slightly wrong (for instance, an extra space, or a missing newline), the edit fails. Production agents use more robust editing strategies such as unified diffs, AST-based edits (modifying the code’s syntax tree rather than raw text), or dedicated text editor tools that are designed for this purpose.
Observability. Production agents log every tool call, every tool result, every decision the LLM makes, and other relevant telemetry. When something goes wrong (and it will), you need to be able to look at the trace and understand what happened and why. Without good logging, debugging an agent would be very difficult (perhaps impossible).
In summary, while the core is simple, the product is hard. But understanding the core means you understand what every coding agent is doing (including the sophisticated ones). We have seen that the difference between our 80-line script and OpenCode is not the architecture. It is the thousands of hours of engineering, testing, and prompt tuning that make the loop reliable, safe, and pleasant to use.
If you want to go deeper, Theo’s video walks through how Claude Code works using the Thorsten Ball and Mihail Eric posts as source material. It is a great watch.
MCP: A Standard for Tools
There is one more thing worth mentioning before we close out this section.
One problem with the current landscape is that every agent has its own way of defining and connecting to tools. If you build a useful tool (say, a tool that queries your company’s database), you have to integrate it separately with every agent you want to use it with. Codex might have one tool format, and Cursor another. Your custom agent has whatever you built.
Model Context Protocol (MCP) is an open standard created by Anthropic and later donated to the Linux Foundation that aims to solve this. The idea is to build your tool server once using the MCP specification, and any MCP-compatible agent can connect to it.
The best analogy I have seen for it is USB. Before USB, every device had its own proprietary connector. Printers, keyboards, cameras, external drives, and mice all need different cables and ports. USB created one universal standard, and now everything works (mostly, especially with USB-C). MCP is trying to do the same thing for LLM tools. Build a tool once, use it everywhere.
MCP is already supported by Claude Code, Cursor, Windsurf, VS Code, OpenAI’s Codex, and others. It is still early, and the ecosystem is growing. Still, the direction is to get us to the point where, instead of every agent building its own integration from scratch, there can be a shared standard that lets tools and agents interoperate.
I am not going to go deep on MCP here because it could be its own post. But if you are building tools for LLMs, it is worth looking at the MCP documentation or this blog post to understand it and how you can use it.
Act 5: Tying It All Together

Image Source: interconnects
We have covered a lot of ground. Let’s trace the full journey one more time.
In Part 1, we learned how LLMs work. Text goes in, gets tokenized, embedded into vectors, and runs through layers of attention. The model predicts the next token, generates it, and repeats. That is the engine behind every AI chatbot you use today.
In this post, we learned how to make that engine do things. The key ideas are simple enough to fit on a napkin:
- A tool is a function that the LLM can ask your code to run.
- A tool call is the LLM saying “run this function with these arguments” instead of generating regular text.
- An agent is an LLM in a loop, making tool calls, reading results, and deciding what to do next until the task is done.
- A coding agent is the same loop with tools for reading files, editing code, and running commands.
That is it. We built a working coding agent in about 80 lines of Python, three tools, a system prompt, and a while loop. The same architecture that sits underneath Claude Code, Cursor, Codex, and every other coding agent on the market.
We established that the “emperor has no clothes” insight from Mihail Eric is real. The core of these systems is not complicated. What is complicated is everything that makes them reliable, safe, and pleasant to use (such as the prompt engineering, the safety guardrails, the context management, the UX, the error handling, the thousands of small decisions that turn a weekend prototype into a product people trust with their codebase).
But you do not need to understand all of that to understand what is happening when you use these tools. You just need to understand the loop.
Writing this post (and Part 1) has changed how I think about the AI tools I use every day. Before I started digging into this, coding agents felt like black boxes. Now, when I watch Claude Code read a file, edit some code, run the tests, see a failure, and try again, I can see the loop. I can see the tool calls. I can see the conversation history growing. It still feels magical, but I feel confident that I intuitively understand what is going on and how it is a loop interacting with a very good language model.
I think that understanding matters. Obviously, not because everyone needs to build their own agent (although you could, and maybe you should try), but because understanding what these tools are actually doing helps you use them better. You start to understand why they fail, why they get stuck, and why they sometimes do something completely unrelated to what you asked. And you start to understand what is likely to get better over time (the models, the context windows, the reasoning, the harness) and what is fundamentally a hard problem (reliability, safety, knowing when to stop).
If you want to go deeper, the resources section below has everything I found most useful while learning this material. The Thorsten Ball and Mihail Eric posts are the best starting points if you want to build your own agent. Theo’s video is a great companion if you prefer watching to reading.
Thanks for reading both parts of this series. I hope it helped demystify what is going on inside the AI tools you use every day. If you have questions, feedback, or corrections, I would love to hear from you.
AI still does not think. It still pays attention. But now it has hands.
Resources
Build Your Own Agent
- Thorsten Ball: How to Build an Agent — Build a code-editing agent in under 400 lines of Go. The best “see it with your own eyes” tutorial. “It’s an LLM, a loop, and enough tokens.”
- Mihail Eric: The Emperor Has No Clothes — Build a Claude Code clone in roughly 200 lines of Python. The post that inspired the title of this series’ central insight.
- Theo: How does Claude Code actually work? — Video walkthrough of the Thorsten Ball and Mihail Eric posts. Great companion if you prefer watching to reading.
- Anthropic Cookbook: Agent Patterns — Reference implementations for common agent workflows (prompt chaining, routing, parallelization, orchestrator-workers, evaluator-optimizer).
Agent Concepts and Overviews
- Simon Willison: Agents — The clearest definition of what an agent is. “An LLM agent runs tools in a loop to achieve a goal.”
- Anthropic: Building Effective Agents — Anthropic’s guide to designing agentic systems. Covers workflows vs. agents, prompt chaining, routing, parallelization, and orchestrator-worker patterns.
- Anthropic: Context Engineering for AI Agents — Deep dive into managing context in agentic systems. Covers retrieval strategies, compaction, and the shift from prompt engineering to context engineering.
- Anthropic: Writing Effective Tools for AI Agents — How to design and evaluate tools that agents can use reliably. Covers naming, descriptions, evaluation-driven development, and common failure modes.
- IBM: What are AI Agents? — Solid overview of agent concepts and how they differ from traditional automation.
- IBM: Agentic AI — Explains the broader “agentic AI” concept and how it relates to individual agents.
- IBM: Types of AI Agents — Textbook taxonomy (reflex, goal-based, utility-based, learning agents) explained clearly.
- IBM: Components of AI Agents — Breaks down what goes into an agent: perception, decision-making, action, and learning.
- GitHub: What are AI Agents? — GitHub’s overview of AI agents and how they are used in software development.
- AWS: What are AI Agents? — Amazon’s explainer covering agent architectures and evaluation.
- Google Cloud: What are AI Agents? — Google’s overview with the Think/Act/Observe framework.
- Microsoft: How do AI Agents Work? — Microsoft’s perspective on agent architecture and Copilot’s agentic features.
- MIT Sloan: Agentic AI Explained — Business-oriented explainer of agentic AI and its implications.
- Glean: 7 Core Components of AI Agent Architecture — Practical breakdown of what goes into a production agent.
- Databricks: Types of AI Agents — Pragmatic taxonomy with real-world examples.
- Evidently AI: AI Agent Examples — Collection of concrete agent use cases across industries.
- HuggingFace: Agents Course — Free course covering the Think/Act/Observe cycle, tool use, and agent design patterns.
Tool Use and Function Calling
- Anthropic: Tool Use Documentation — Official guide to implementing tool use with Claude. Covers tool definitions, message flow, and best practices.
- Anthropic: Text Editor Tool — Anthropic’s built-in text editor tool for code editing, more robust than simple find-and-replace.
- Anthropic Python SDK — Python SDK documentation with tool use examples.
- OpenAI: Function Calling Guide — OpenAI’s equivalent guide to tool use (they call it “function calling”).
Context Management
- Anthropic: Context Windows — Documentation on context window sizes and management.
- Anthropic: Compaction — How to use conversation compaction to manage long agent sessions.
- Anthropic: Prompt Caching — Reduce costs and latency by caching repeated parts of the conversation.
- Lost in the Middle: How Language Models Use Long Contexts (Liu et al., 2023) — The paper showing that LLMs attend less to information in the middle of long contexts.
- KV Caching Explained — Accessible explainer of how KV caching speeds up autoregressive generation.
MCP (Model Context Protocol)
- MCP Documentation — The official specification and getting-started guide for MCP.
- Anthropic: Introducing MCP — Anthropic’s announcement of the Model Context Protocol.
- Descope: What is MCP and How It Works — Clear third-party explainer of MCP with diagrams.
Coding Agents (Products)
- OpenAI Codex — OpenAI’s cloud-based coding agent with MCP support.
- Cursor — AI-powered code editor built on top of VS Code.
- Amp — Coding agent from the team behind Zed, built in Go.
- Aider — Open-source terminal-based coding agent for pair programming with LLMs.
- Cline — Open-source VS Code extension for autonomous coding.
- Claude Code — Anthropic’s CLI-based coding agent. Best practices guide.
- There are many more like OpenCode, Pi, RooCode, Crush, Kiro, etc.
Coding Agent Deep Dives
- Claude Code: Best Practices — Anthropic’s official guide to getting the most out of Claude Code. Covers context management, CLAUDE.md files, and effective prompting patterns.
- Anthropic: Agent Skills — How to package domain expertise into reusable skills that agents can discover and apply.
- freeCodeCamp: The Claude Code Handbook — Comprehensive guide covering installation, workflows, parallel agents, MCP integrations, and autonomous loops.
- LSP (Language Server Protocol) — The protocol that enables type checking, go-to-definition, and other IDE features that production coding agents integrate with.
- ripgrep — The fast search tool that many coding agents use under the hood for codebase search.